Turn new customers into lifetime fans: automate welcome emails with trainheroic and zapier
Coach Development | UncategorizedThis blog is part 2 of our athlete life-cycle communication series designed to help coaches selling training community memberships in the TrainHeroic Marketplace send automated email communications to their customers.
In this edition of the series, we focus on sending a welcome email to customers who convert from a free 7 day trial to paying members of your digital training community. We’ll cover everything you need to know from messaging strategy to building out the automation using MailChimp, Zapier, and TrainHeroic.
If you have not already implemented the automation covered in our first guide, start here before diving into the second chapter below.
We estimate the full setup following this guide to take roughly 1 hour.
Buckle in, do this work at a laptop or desktop, and get ready to automate like the pros.
Chapters:
// welcome a new paying member to your online training community
When you make an online purchase, you probably check your email to look for a confirmation email. Sometimes you’re looking for instructions, shipping tracking numbers, etc. At the very least, it’s reassurance that your order went through.
So when a new athlete converts from a free trial to a paid client, they are probably expecting the same. No, we don’t have tracking numbers to send. But, think of it as an opportunity to reach out personally and acknowledge them as a new client.
This is also a chance to let them know what else to expect as a new member of your training community, and to deepen the connection between the trainee and your coaching brand. This is an important step in the customer journey, and a vital opportunity for increasing the lifetime value you get from each athlete.
But the problem is, you just don’t have enough hours in the day to personally reach out to each and every new client. So how do you welcome them with open arms?
Automation!
We love email automation because it takes away manual and repetitive work, while also ensuring that each email is sent at the right moment. That is what we will cover in this guide.
We’ll be walking you through what to send when a client converts from a trial and exactly how to set it up using Zapier & Mailchimp.
// Email copy and creative: building a welcome email that deepens the connection between your brand and your customer
When creating your welcome email, it’s important to remember that this athlete just completed a 7-day trial.
If you set up an automated trial email sequence using this guide, then they will have already received information and resources to get started with their training. TrainHeroic also sends a series of emails throughout their trial to get them up to speed on using the TrainHeroic app.
With that being the case, we don’t need to resend and repeat information that they already received during their trial.
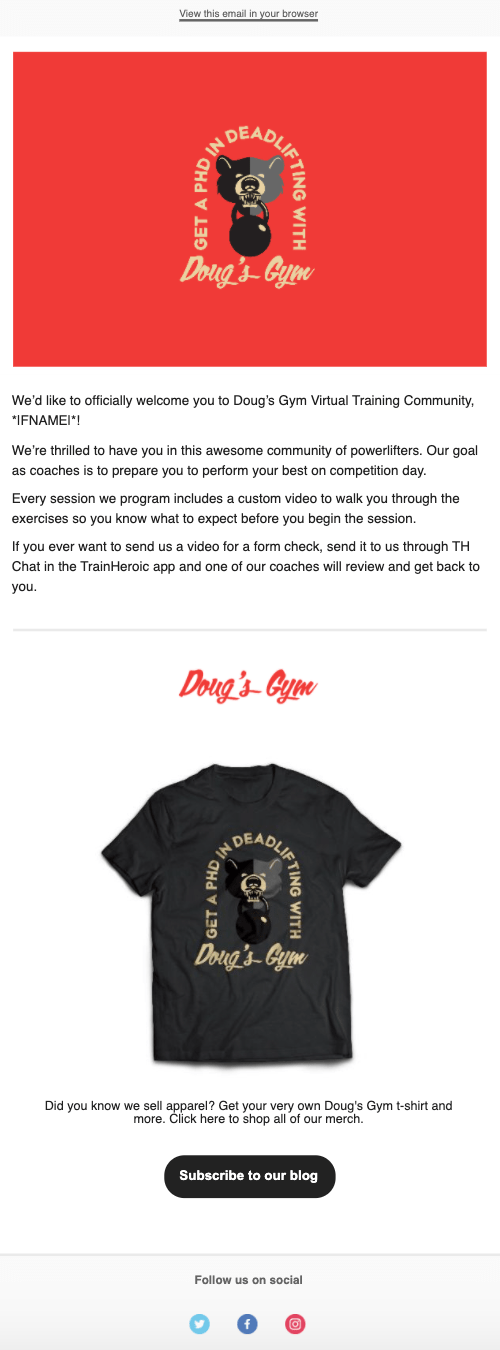
The purpose of the welcome email is to begin to deepen the connection between your training community and the new client. Keep in mind that consumers are always (consciously or subconsciously) weighing the price they pay for any product / service with the value they perceive they are getting from it. Letting them know about your social media pages, blog, YouTube channel, etc. is a great way to expand from one channel connection to many.
This is your chance to take your business outside of the platform and show them how else to engage with (or rep) your brand. Remember, the battle against athlete churn starts at day 1. If you can change the mindset of your athletes from a transactional one to an emotional brand connection, you will have created a long-lasting customer. If an athlete feels they get not only their training from you, but also education, entertainment, guidance, and maybe even a few closet staples or their favorite training shirt, you’re on the fast track to a loyal repeat customer.
Build and design your email
Below, we’re going to lay out recommended email topics & suggested copy. As you read through, begin building your email template in MailChimp. If you’re starting from scratch and need help getting started with templates, follow this MailChimp guide.
Use our template (including product images) as a starting point with this link. Note: you’ll need a MailChimp account to access this. Don’t forget to edit all links including social.
// creating email automation with TrainHeroic, Zapier, and MailChimp
After your email template is built, you’ll need to create a tag that ensures the email is sent to the right people.
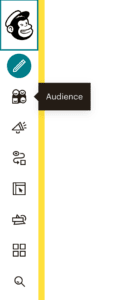
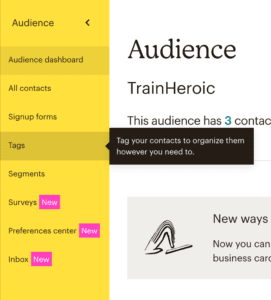
Select Audience from the left menu then Tags.
- To get started, select Audience in the left navigation then Tags.

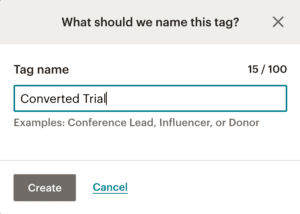
3. Give your new tag a name. We’re going to call this one Converted Trial. After naming it, select Create.
Creating your automated campaign
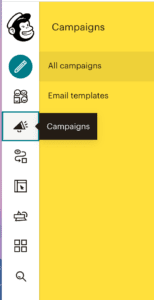
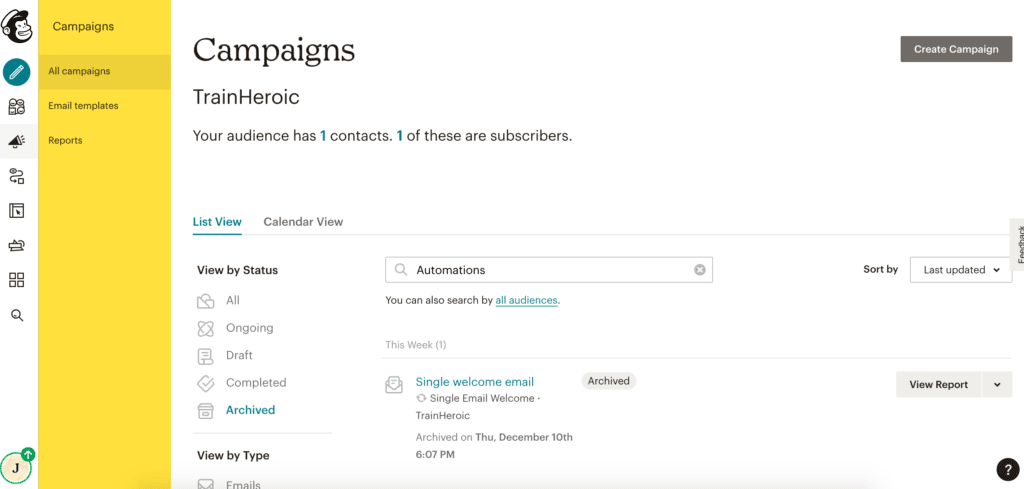
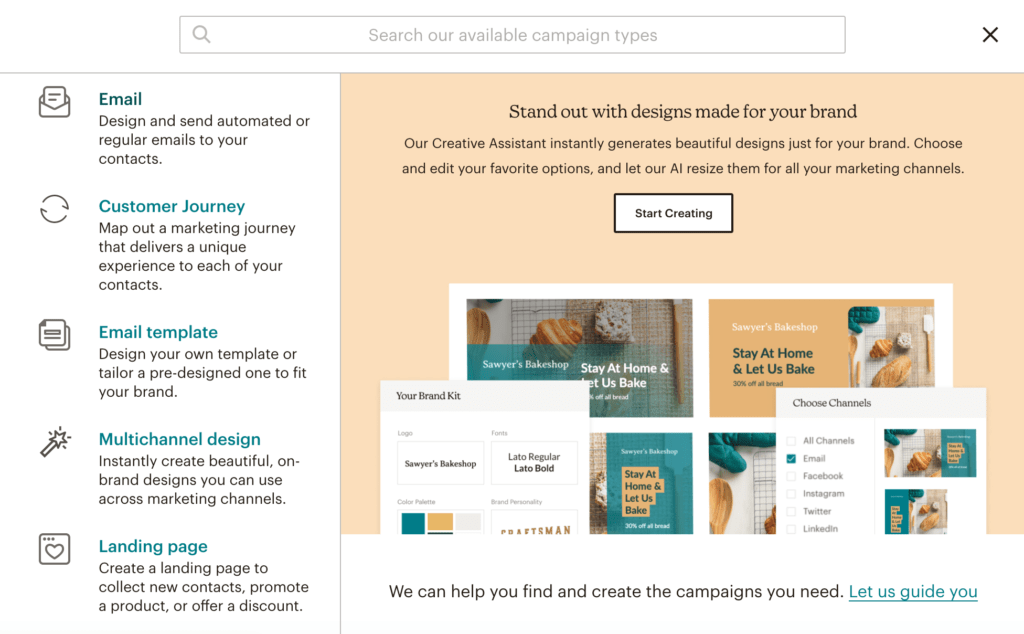
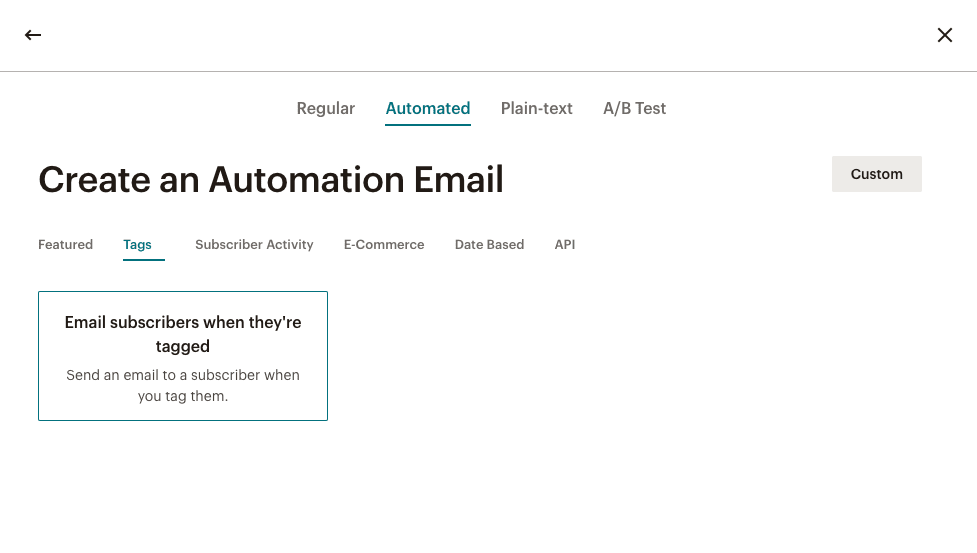
Now that you created your Converted Trial tag, you’re ready to set up the automated email campaign.
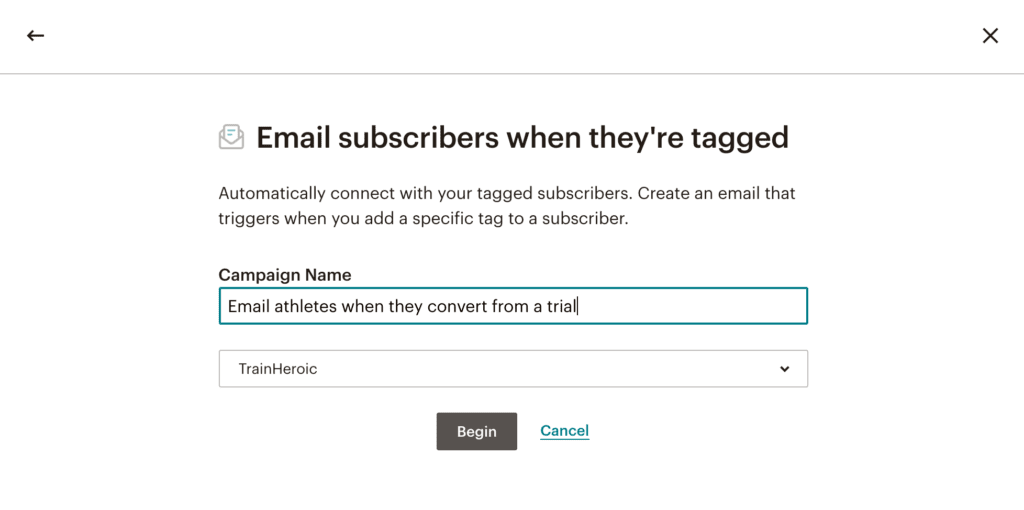
Build your workflow
Now we’re ready to configure the settings for this campaign.
1. To change the trigger, select Edit.

2. Let’s send this email 1 hour after they convert from their trial. To do this, change the delay to Wait 1 hour.
Under Settings, select the tag Converted Trials.
Not adding a tag will result in the email sending to everyone in your audience, which we do not want.
When complete, select Update Trigger.

Have multiple training communities?
If you have multiple teams and are sending team-specific campaigns, follow the step below. Otherwise, skip this next step.
1. Select Add next to Filter by segment or tag.
Check the box then select Contacts match the following conditions

2. Select the dropdown, and locate the custom field you previously created: Team Name.
Next, indicate which team this campaign applies to.
Team Name is <enter your team or community name>
Make sure spelling and capitalization are correct or else the filter may not work properly.
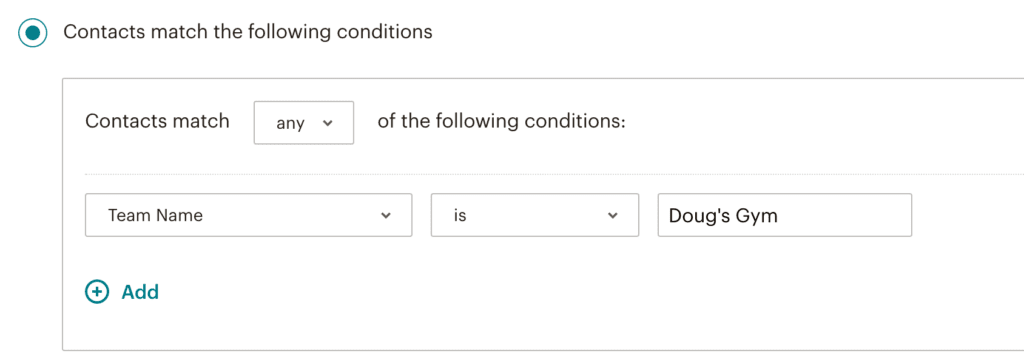
3. When finished, select Save Segment in the top right corner.
You have now told this workflow to only send to athletes who converted from a trial and who are part of a particular team.
Adding email templates to your campaign
- Next, you are ready to select your email template. Select Design Email.
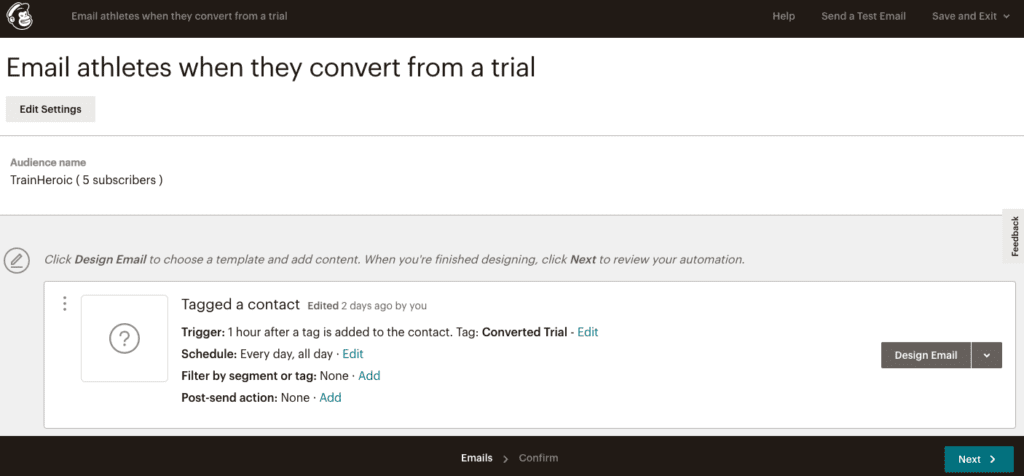
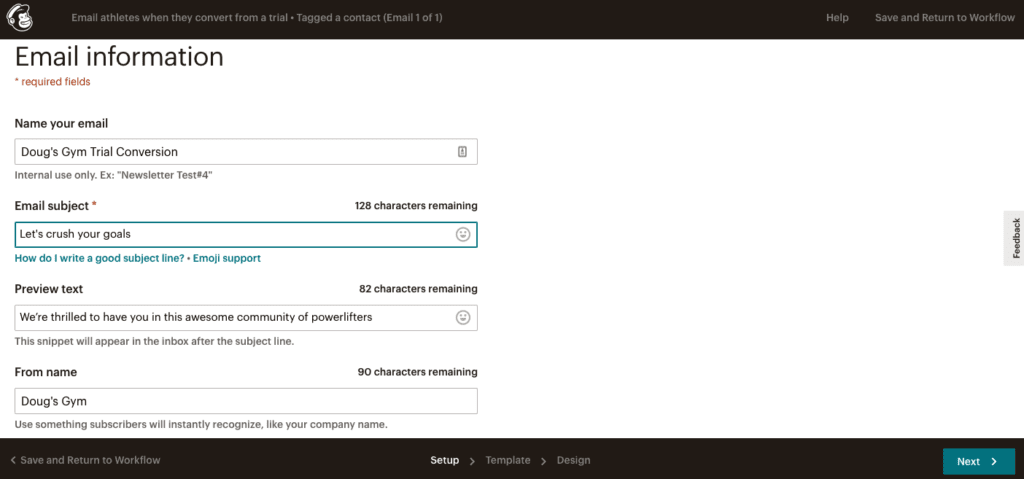
2.Give this email a name and fill in your desired email subject, preview text, from name, and from email address. Then hit Next.
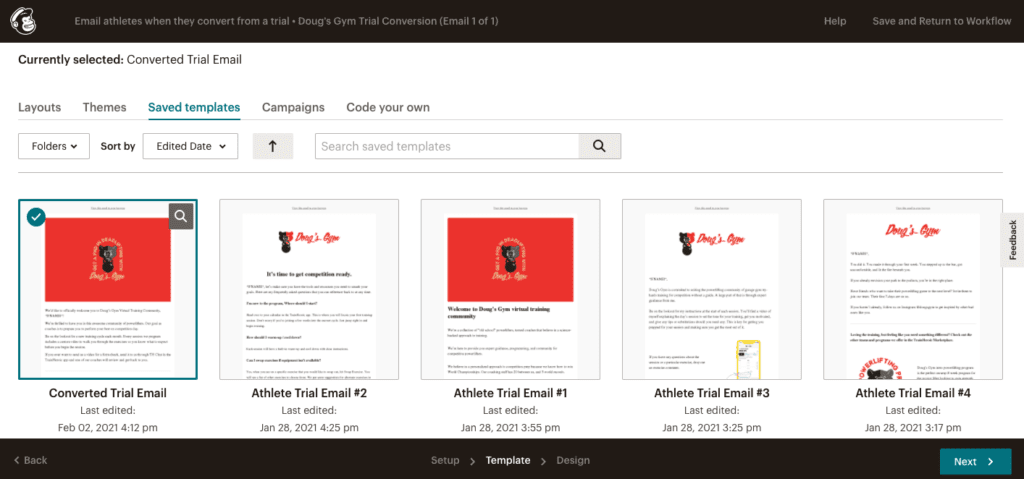
3. Click on the Saved Templates tab, find your desired template, then hit Next.
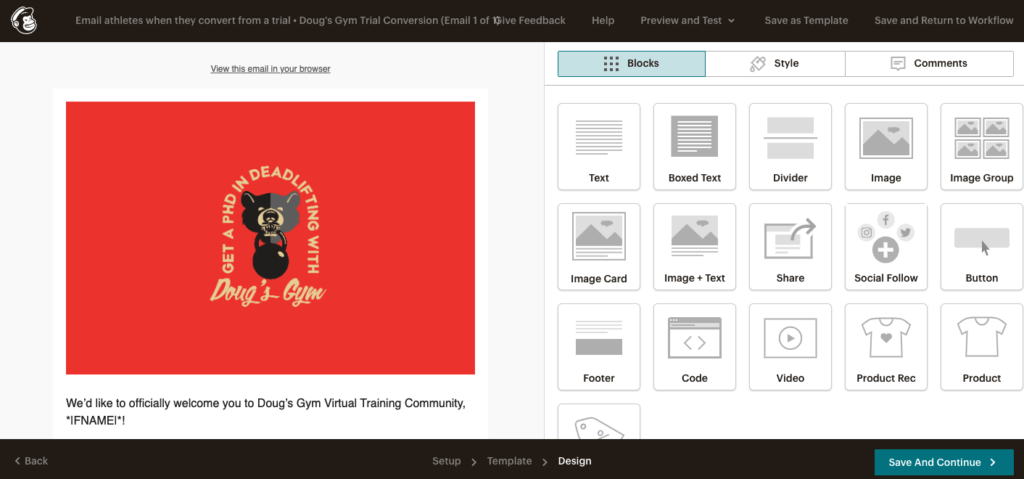
4. Review your template, make any necessary changes, then select Save and Continue when done.
5. This campaign consists of one email, so you’re done with the setup. Go ahead and select Send a Test Email so you can see what it looks like in your inbox. (If you don’t see it right away, check your spam folder.) When you’re happy with your email and ready to continue, select Next.
If you would like to send additional emails in this series, select Add Another Email and follow the same steps.
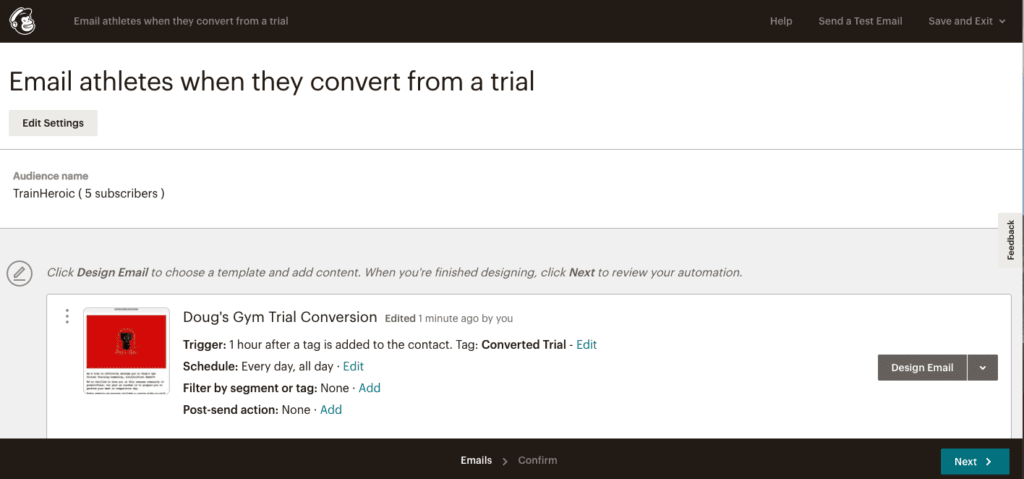
6. You’ll see an overview of the campaign you just built. Give it a once over and when you’re ready to launch, select Start Sending.
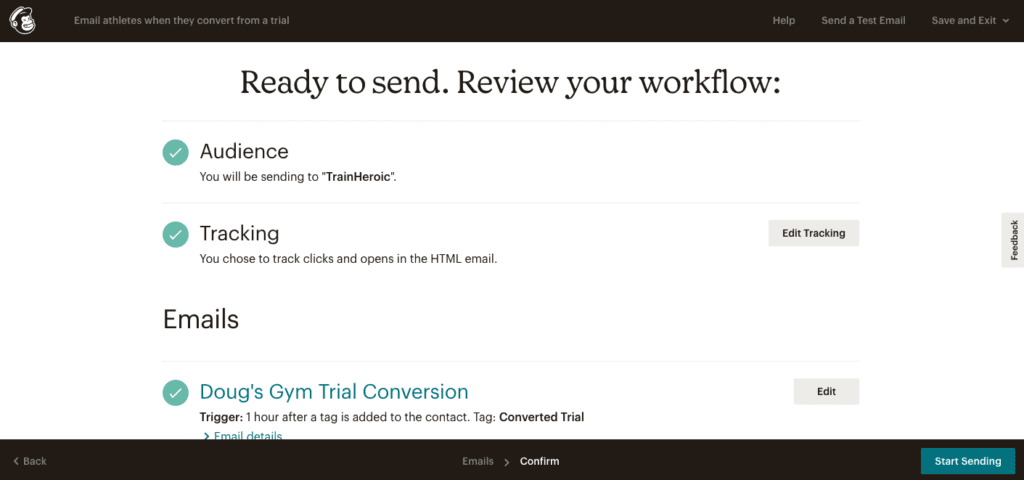
7. When you view all of your campaigns, you will see that this campaign is now Sending.

Now, anytime a Trial Conversion tag is added to a user, this email campaign will trigger.
// connecting zapier, trainheroic, and mailchimp
Now that your campaign is actively sending in Mailchimp, let’s automate it through Zapier.
- Head to the TrainHeroic Integration page in Zapier.
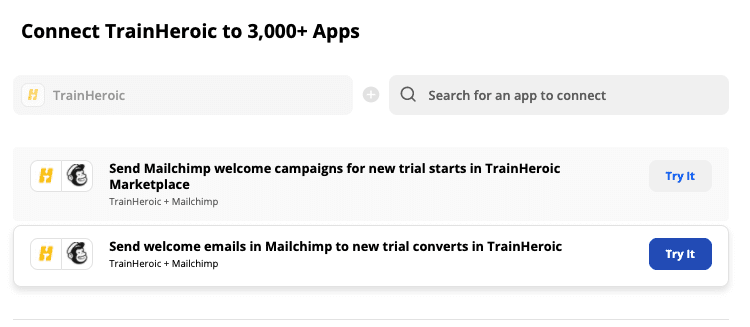
Scroll down on the page and locate the section labeled Connect TrainHeroic to 3,000+ Apps. This is where you will find our pre-built templates to help you connect supported apps even faster.
Select Try it next to the template named “Send welcome emails in Mailchimp to new trial converts in TrainHeroic”
Only use this template if you are using Mailchimp as your email provider. If you’re using a different email service provider, you’ll have to make a new zap and start from scratch.
2. Next, in the bottom left corner, select Go to Advanced Mode. This step is important so we can configure an additional setting for Mailchimp.
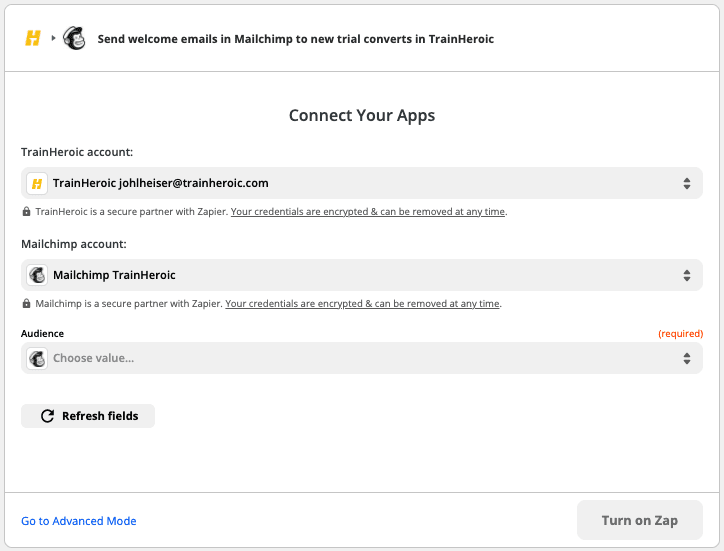
3. Begin by hovering over the trigger and selecting Edit.

4. Under the Choose app & event dropdown, you’ll notice that the app and trigger have already been selected because we started with a template. Simply select Continue.
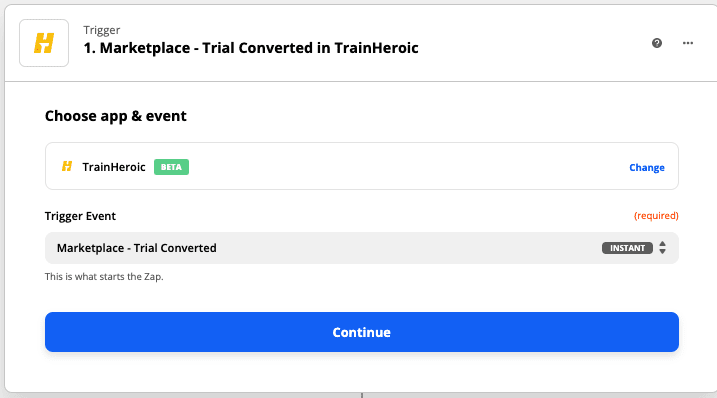
5. Next, select your TrainHeroic account. Then hit Continue.
If you haven’t previously connected your TrainHeroic account, you will be prompted to log in.
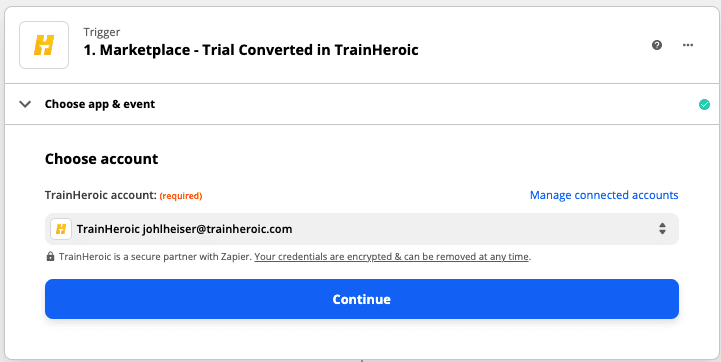
6. Next, select Test trigger.
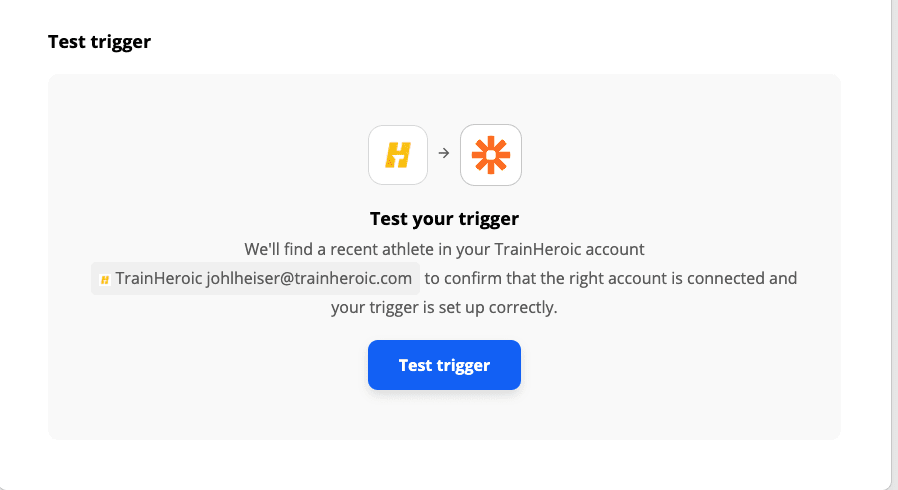
7. Next, Zapier will search for an athlete on your team to be used for testing. We recommend choosing yourself. That way, you will be on the receiving end of emails during testing and one of your actual athletes will not receive an email out of context. Once identified select Continue.
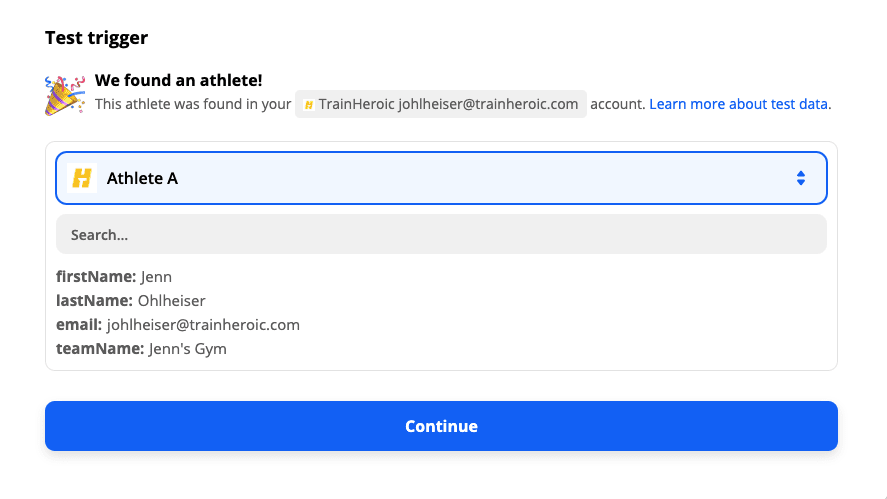
7. Now that your TrainHeroic trigger is set, let’s set up Mailchimp.
Since we started with a template, the app and action have already been selected for you. Select Continue.
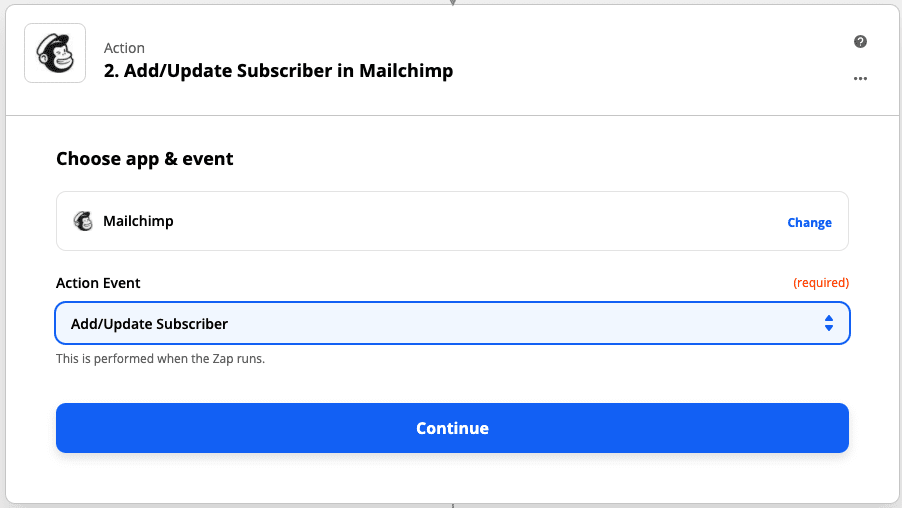
8. Next, connect to your Mailchimp account. Then hit Continue.
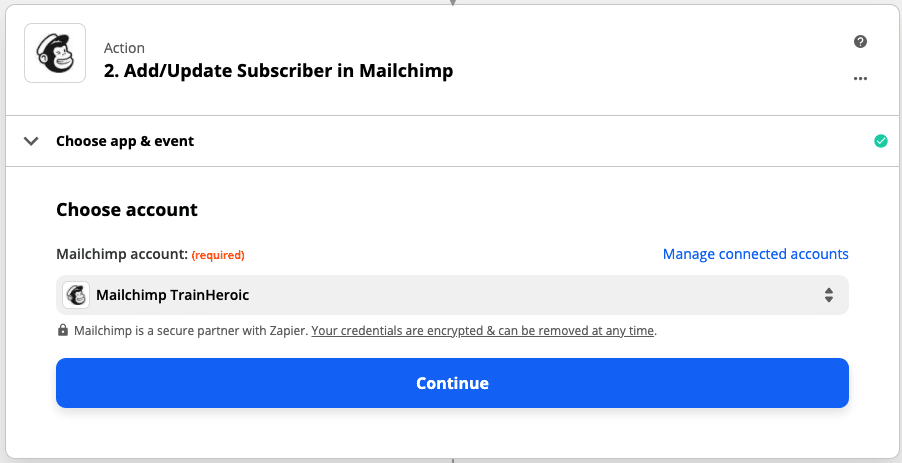
10. To set up your action, fill in the following fields:
- Audience: Select your Mailchimp audienc
- Subscriber Email: Grab your test athlete’s email from the dropdown
- Update Existing: Make sure this says Yes
- Tag(s): Select your Converted Trial tag from the dropdown. (This is how the tag is assigned to the athlete)
- First Name: Select your test athlete’s first name from the dropdown
- Last Name: Select your test athlete’s last name from the dropdown
- Team Name (optional): If you have multiple teams and already created a Team Name custom field in Mailchimp, select your test athlete’s team name from the dropdown
- Select Continue when done
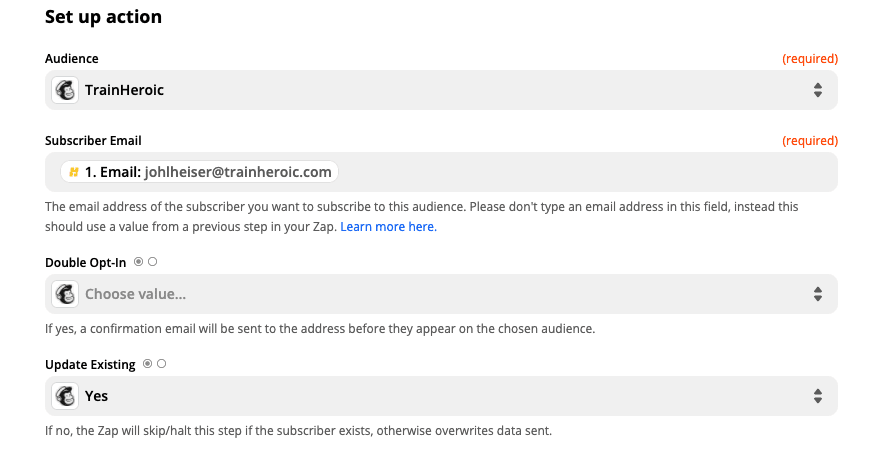
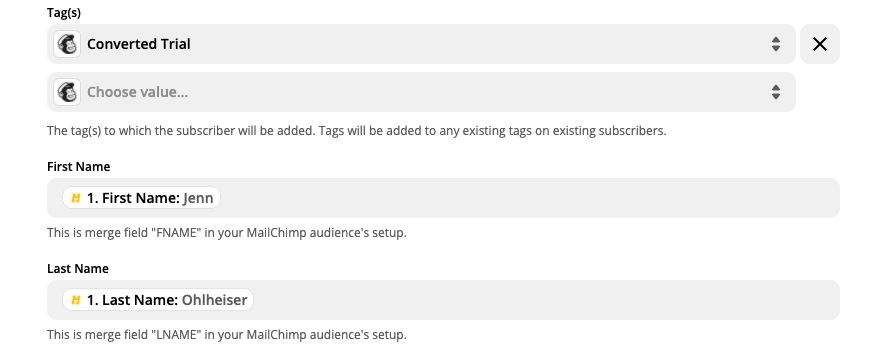
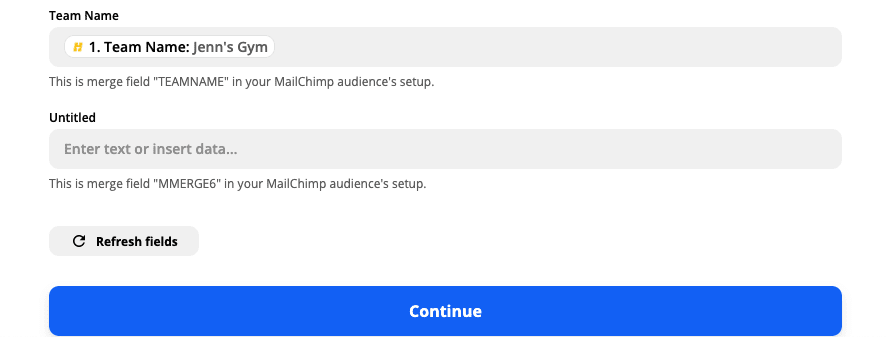
11. Now you’re ready to test the action you set up. Hit Test & Review.
You should receive a green banner indicating a subscriber was successfully sent to Mailchimp.

12. Before turning on the zap, let’s look at what was just happened in Mailchimp.
In Mailchimp, click on Audience then All Contacts. You should see the user and their associated data that Zapier just sent in, including the Converted Trial tag.

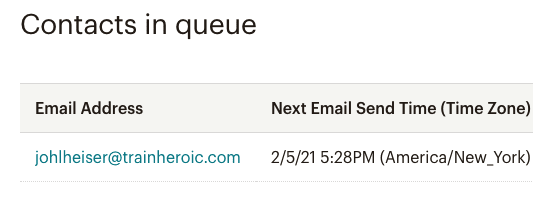
13. Now, find your converted trial campaign in the Campaigns tab and View subscribers in queue. You should see your email waiting to be sent. It’s in the queue because we added a 1-hour delay when setting up this campaign.

14. Now that we confirmed the automation is properly working, head back to Zapier and select Turn on Zap to launch.

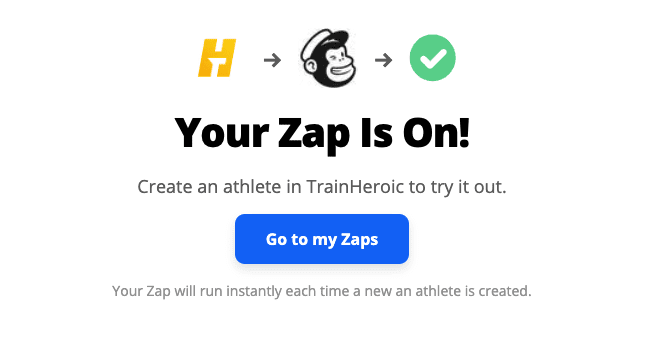
15. You’ll receive a confirmation message letting you know that the zap is turned on
READY TO TRY TRAINHEROIC?
Our powerful platform connects coaches and athletes from across the world. Whether you are a coach or trainer looking to provide a better experience for your clients, or you’re an athlete looking for expert programming, click below to get started.
Want more training content?
More coaches and athletes than ever are reading the TrainHeroic blog, and it’s our mission to support them with the best training & coaching content. If you found this article useful, please take a moment to share it on social media, engage with the author, and link to this article on your own blog or any forums you post on.
Be Your Best,
TrainHeroic Content Team
HEROIC SOCIAL
HEROIC SOCIAL
TRAINING LAB
Access the latest articles, reviews, and case studies from the top strength and conditioning minds in the TH Training Lab
