How to Deadlift: A Four-Step Guide
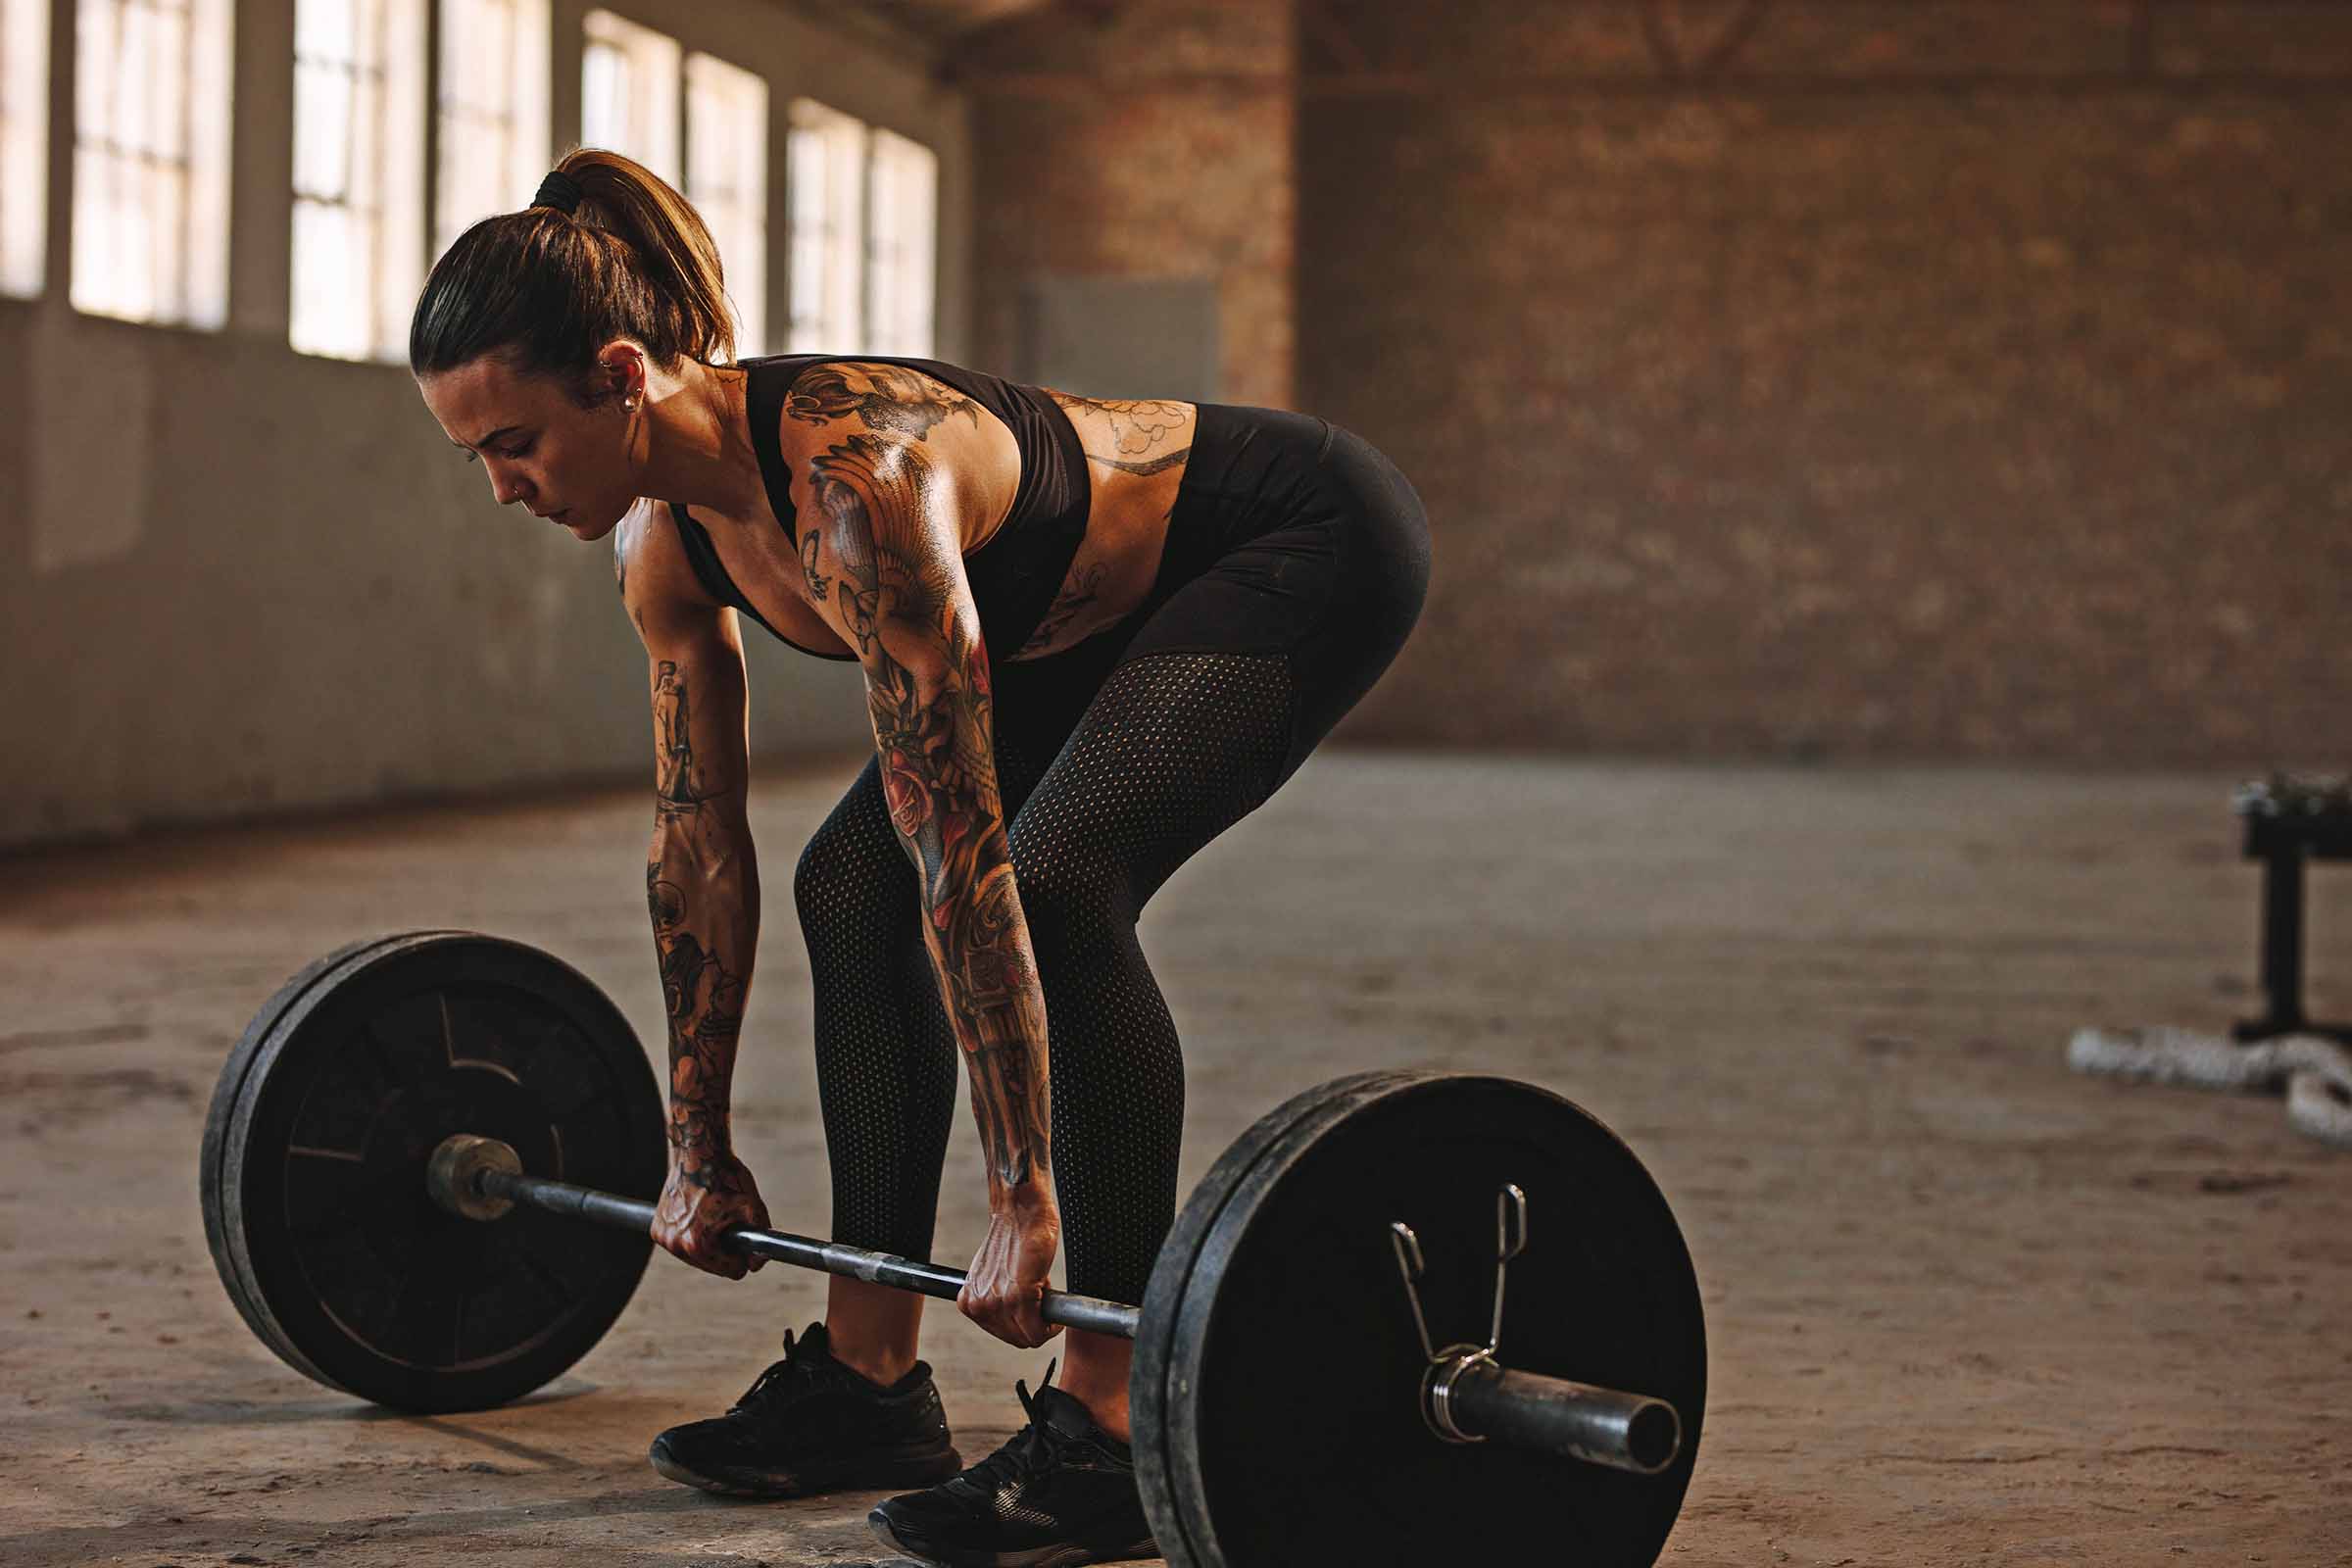
The deadlift is one of the best compound movements to give you monstrous legs and a resilient back, but only if you do it right. Get the most out of your deadlift (and avoid injury) by following these four steps. Remember: deadlifts aren’t dangerous. Get a coach to check your form if you aren’t sure!
Anthony Cuevas is an NCSF Certified PT based out of New York with six years of experience as a personal trainer. In this blog, he guides you through performing a perfect deadlift, adding in variations, and programming it into your routine.

Why Deadlift?
The deadlift is a compound (or multi-joint) exercise that works your glutes, builds your hamstrings, and strengthens your lower back. I program deadlifts for almost all of my clients in some variation, whether it’s with a barbell, dumbbell, or kettlebell.
It’s known as one of “the big three” lifts in powerlifting (alongside the bench press and squat) for a reason. Not only is it great for aesthetic purposes, but the deadlift is also a very functional movement that applies to picking up and carrying anything off the ground (think of all the trips to the car you could save by carrying heavier grocery bags.)
In addition to sculpting shapely legs and building strong back muscles, deadlifts improve your posture, correct muscle imbalances, and strengthen your deep core muscles.
Unfortunately, deadlifts can cause long-term spine injuries if done incorrectly. But don’t believe the negative hype! Any movement can potentially cause injury if your form is off. Follow these four steps to ensure you deadlift safely and successfully.
Change the Way You Train
How To Deadlift With Good Form
Step 1. Setup
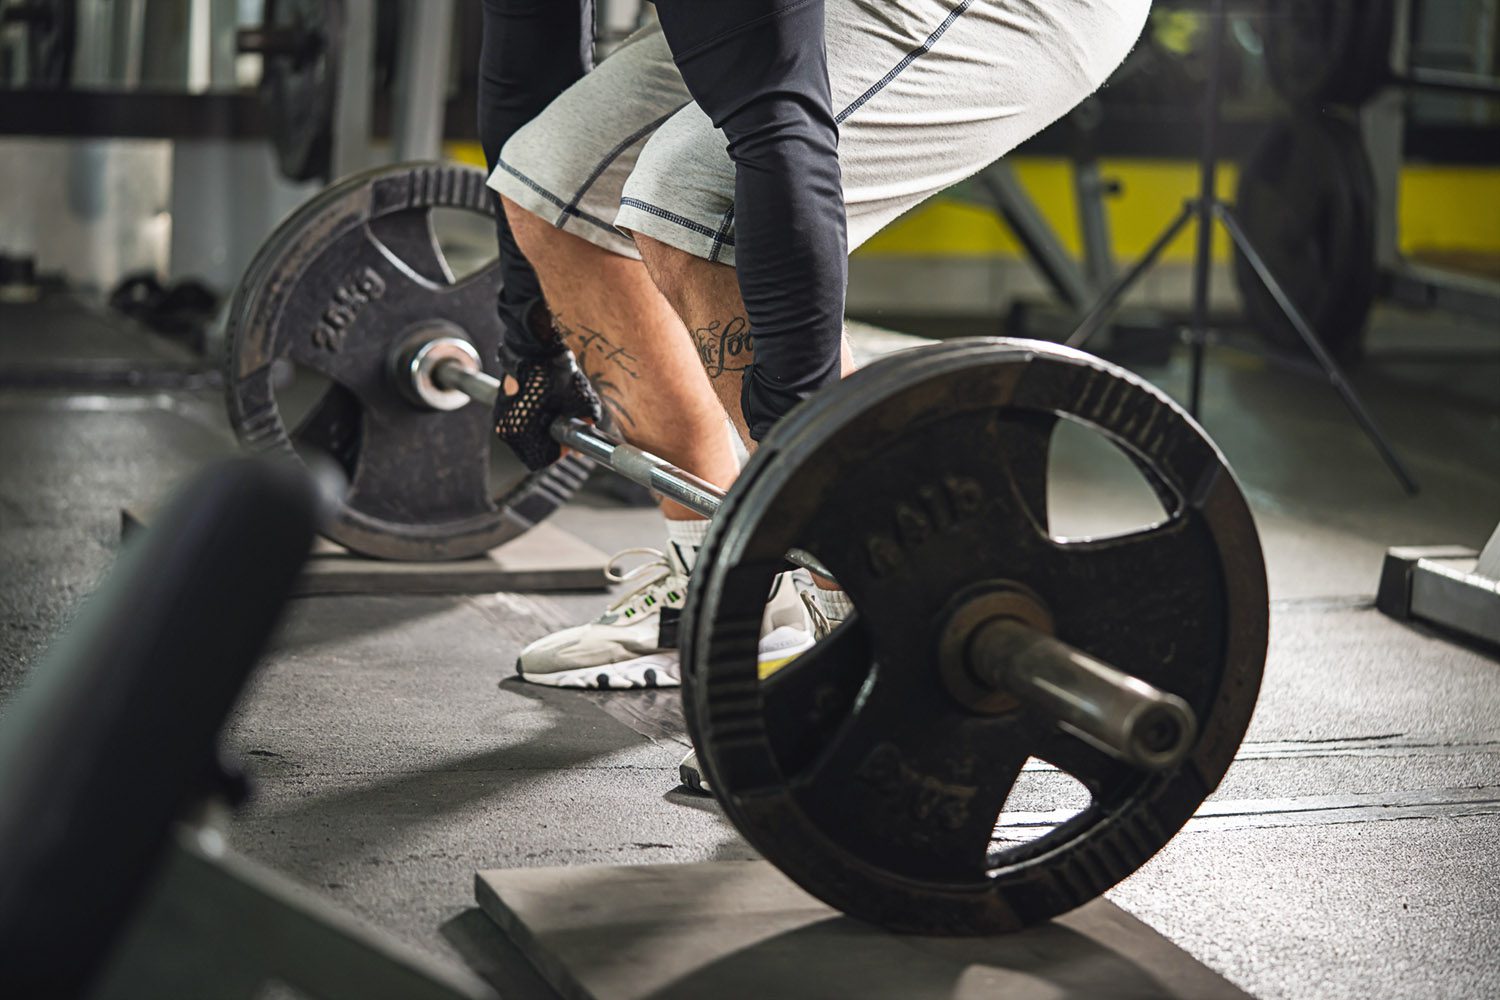
Step up to the bar. When you look down, the bar should run over about the middle of your feet. Your shins need to be near or “scraping” the bar as you pull to make sure the tension stays in the necessary places. If that tension isn’t there, the movement won’t be effective.
Step 2: Grip
Hinge your body by engaging your core and bending over, bringing your butt back while maintaining a neutral spine. Standing with your feet about shoulder-width apart, place your palms on top of the bar and wrap your fingers around the bar. Your knuckles should face down toward the floor.
There are several ways you can grip the bar when doing deadlifts. The three most common styles are the double overhand, hook grip, and mixed grip. Each has its own benefits, but I suggest using a double overhand grip in the beginning.
Step 3: Set Your Back
Pull your shoulders down and back. Pretend you’re trying to bend the bar in half with your arms. This step is crucial for engaging your lats, keeping everything compressed, and maintaining a neutral spine. It also helps you avoid the rounded cat back, which is the biggest problem I see people struggle with when deadlifting. (The “cat back” is when your chest sinks and your back rounds forward in the middle of your lift – it’s basically asking for injury!)
Coach’s tip: Tuck your chin and resist the urge to look at any mirrors! Your gaze should be at the floor a few feet in front of you.
Tucking your chin ensures your body stays stable throughout the lift without creating unnecessary tension in your upper back. It also keeps the movement lower-body centric.
Step 4: Brace Your Core
Don’t breathe from your chest, breathe from your core. This form of breathing keeps everything tense and stable. If you don’t know how to breathe from your core, practice with your weight or lever belt:
- Lay on the floor with your belt on.
- Take a deep belly breath, first expanding your stomach and then your chest.
- Hold your breath for a few seconds, and then release
Think of bracing your core like someone is about to punch you in the stomach.
Step 5: Pull!
Screw your feet into the floor and pull the bar up your body, keeping your arms straight and core tight and eyes forward. As you lift up the bar, it should look like this:
To become a deadlift master, you need self-awareness and muscle memory. The only way to do that is by practicing consistently. If you need to look at your form, record your lifts and analyze it later.
Deadlift Variations
Different variations of deadlifts can help you reach specific goals or scale the movement depending on your fitness level. For example, a single-leg Romanian deadlift will challenge your glutes, ankle stability and balance, while the sumo deadlift puts more emphasis on your quads.
I suggest including a deadlift or deadlift variation at least twice a week. Ultimately it’s up to you whether you make it a primary powerlifting movement in your program (using the barbell) or use it as an accessory movement to build more aesthetically pleasing legs (dumbbell and kettlebell variations).
Here are some of my favorite deadlift variations:
- Kettlebell deadlift
- Dumbbell deadlift
- Romanian deadlift
- Single-leg deadlift
- Sumo deadlift
- Single-leg landmine RDL
All of these come with their own unique challenges, but to build strong legs that are both athletic and aesthetic, I suggest doing all of them at some point throughout your program. They all have very similar techniques, but it pays to learn their differences.
Coach’s Tip: If you’re not sure which variation you should use, check out this blog that explains the differences between each one: Which Deadlift Variations Hit Your Goals?
How to Program Deadlifts Into Your Strength Training Routine
As mentioned before, I like to program the deadlift at least twice a week. Here’s how I recommend adding it to your current routine:
Day 1. Tech Day
Deadlift Warmup (Speed Focus)
225 lbs 2×1
245 lbs 2×1
275 lbs 2×1
Working Sets (Tech Focus 2-4 Min rest in between)
315 lbs 3×3
345 lbs 3×2
365 lbs 3×2
385 lbs 1×1
405 lbs 1×1
Day 2.
1 Rep Maxes only
Warmup
Same as Day 1
Working Sets
345 lbs 3×1
385 lbs 3×1
405 lbs 2×1
415 lbs 2×1
Want Training Tips, Exercise Guides & Knowledge Bombs Sent to Your Inbox?
Sign up for the FitNerd newsletter from TrainHeroic
Related articles
How To Zercher Squat: One Exercise To Rule Them All
I have a secret weapon exercise that will get us really close; it has a lot of bang for its buck. It builds massive quads, big glutes, a wide back, and some awesome biceps. Exactly what every athlete needs.
What Does Paralympic Strength Training Look Like?
Paralympians undergo rigorous training when preparing for the Paralympic Games. While the Paralympics only last about two weeks, getting ready takes place all year, as these athletes are among the most dedicated in the world. Here’s how people with disabilities...
Your Guide to Passive Recovery Strategies
What is Passive Recovery? I don’t think that there exists a complete guide for athletes that tackles the underrated topic of “Recovery-Regeneration” strategies. I plan to disclose a majority of the scientific and practical information that I know of on this topic and...

Join the community
Sign up for the latest training news and updates from TrainHeroic

About TrainHeroic
Support
Made with love, sweat, protein isolate and hard work in Denver, CO
© 2022 TrainHeroic, Inc. All rights reserved.

